Categories overview
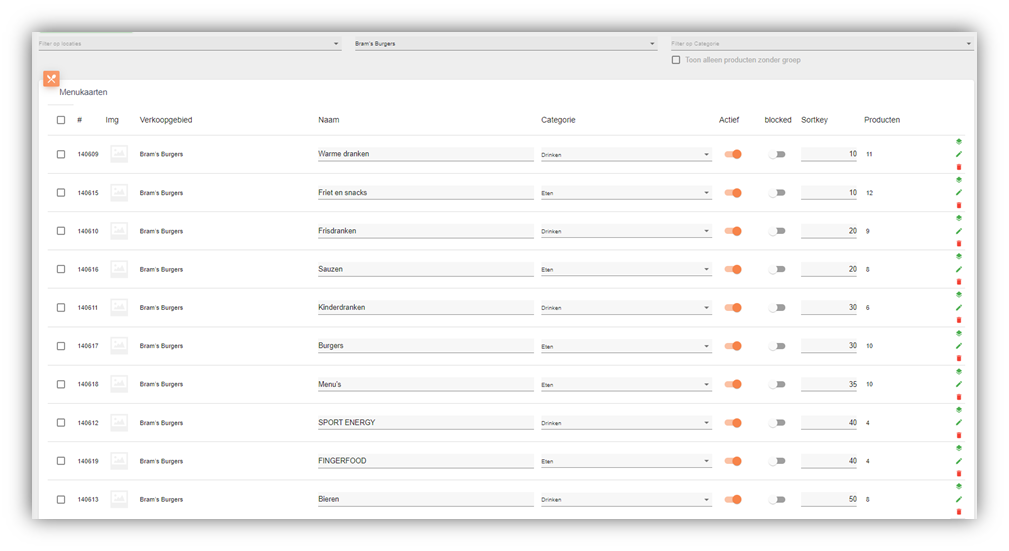
Filter on location: Here you can filter by your venue. Once you have entered this you can then filter by sales area. You will then only get the sales areas that fall under the selected venue.
Select in settlement: Here you can filter by sales area. The moment you have selected your sales area here, you will get all the menus that fall under the selected sales area.
Filter on category: Here you can select a menu cards within your sales area. The moment you select a menu you will be taken to the products within the selected menu.
Checkbox: You can select multiple products at once so you can edit multiple products at once.
#: Here your category id is displayed in numbers.
Img: Here a picture will be displayed when you have added a picture to the menu. You can add photos in menus and then branding and design.
Sales area: Here is the name of the sales area you are working in.
Name: This contains the name of the menu. You can also change the name of the menu here.
Category: Here you can filter whether your menu falls under food or drink. If you put the menu under food for example, the menu will be displayed under the food button
Active: Here it is displayed whether the menu is active in the cash register or not.
Blocked: You can block menus here so they are not displayed in the application.
Sortkey: With the sortkey you can give the menus a rank order. The closer the number is to 0 the higher it will be in the rank order. In a manner of speaking you have 3 menus lunch, dinner, breakfast.
If you give lunch sortkey 1 then it comes at the top.
If you give dinner sortkey 2 then it comes in the middle.
If you give breakfast the number 3, it will appear 3rd in the application.
Products: Displays how many products are in the menu.